
Welcome to my 2012-2013 classroom tour! My room has a connecting door to another classroom where me and another teacher share a student bathroom that is located in my room. This year I was able to really focus on the idea that I dont necessarily like "theme's". In the past I would choose a theme and then half way into my purchases begin to feel that my hear is changing. That is why this year I decided that long goes the themes and this year I will focus on what makes me happy... color!
Cubby Area
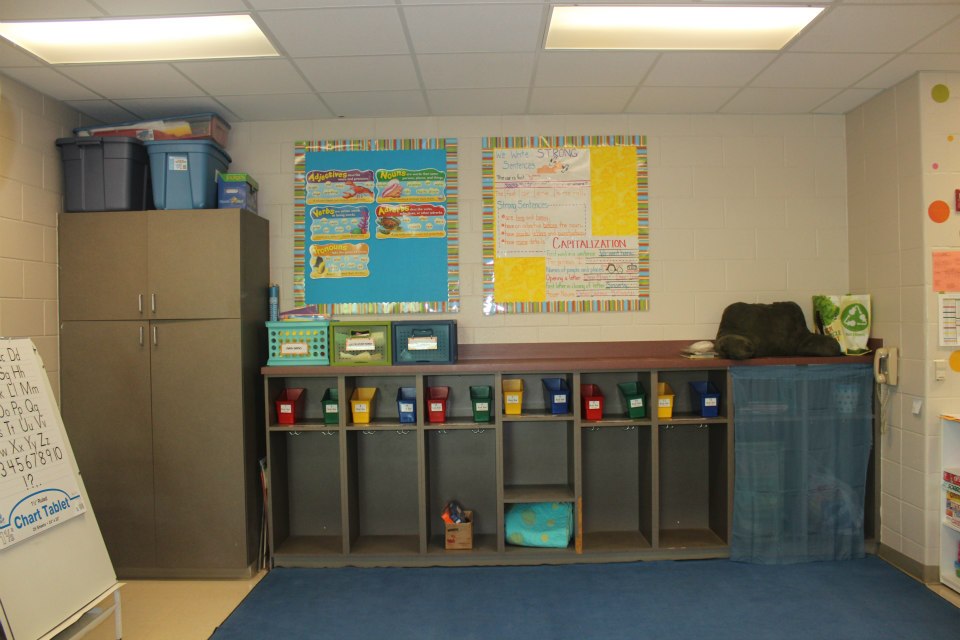
Students share cubbies at our schoo. This is a picture of just half of my cubbies. Each student has a book box that has their mailbox number on it. Students keep everything from their backpacks, snacks, coats and library books in it. Luckily I had a smaller class size this year and was able to use 2 cubbies to store items that I use on a daily basis... hint the blue curtain.
The bulletin boards... are my creation. I was tired of having a wall of cinder block. Nothing seemed to stick to it. I went to my local hardware store and purchased styrofoam insulation (roughly 10 foot long). After cutting it to size I was able to get 2 boards out of it. Next, I covered it with fabric and then added bulletin board border. Total cost.... Roughly $15. Now talk about easy way to add more stapling area!
Task Card Wall

This is my task card wall. I had an extra curtain rod and decided to use it at school. After adhearing 3-3M hooks (the big ones) to the wall I hung the curtain rod and 2 mesh shoe holdes from Big Lots. I added labels to each pocket so that it is easy for students to pick out task cards that are related to what we are currently learning about.
For the most part the task cards are all math related. Students use blank game boards that I printed and laminated and a deck of cards and viola... less space is used!
My Command Center

My command center can seem hectic but any teacher knows that hectic is our middle name! To the right, students have their turn in trays and mailboxes. Below the mailboxes, grouped students are assigned a green tub where I have added Guided Reading books that are on their level. Students can take 2 at a time and at the end of every other week I collect them all and add a whole new bacth of books. I purposely choose to only have non-fiction books and chapter books in those tubs in hopes that it will help build their stamina and vocabulary.
Past the green tubs is my restoom and connecting door to my neighbor teacher! My desk is smack in the middle where all of my students meet for small group math lessons daily. I finally got smart and marked 6 chairs that students know must always stay at my table. Behind my table is my calendar and word wall. Lastly to the right is our computer station.
Sink Area

Math Wall

As mentioned earlier, students do not partake in a whole class math lesson. Each day, I have students rotate every 20 minutes. In this picture you can see my Math Rotations chart.
Above the Math Rotations chart you can see our classroom timeline that we use to order our important heroes that we learn about daily. I used my Silhouette SD paper cutter to cut out my dates.
Whole Classroom View

This year I opted to have my students desk in a horseshoe shape. Students are still in groups of 4-5 and are assigned a color. This layout has definitly cut down on distrations and talking. It also gives me a great view from the front of the classroom of all of my students adorable faces. No student has their back to me!
Word Wall

Using my Silhouette SD I was able to create these awesome letters that go perfectly with my color scheme. I used painters tape to creat my grid.
You can also see my Monday-Friday drawers wher I keep all of our worksheets for the week.
Library

I am very blessed to have windows in my classroom and love keeping them wide open for the sun to shine through. Note: The stop sign is hung on Back to School night to preven kids from going into my library before I have had a chance to teach them how it is organized. This prevents any headaches of reorganizing before the first day of school... Ehhh... Im getting smarter!
I organized and uploaded all of my books using the Classroom Organizer and its iPhone App. Now, this took time. First I divided my books into categories, created those categories on the Classroom Organizer website and then I started scanning my books in.
Few things to note:
Create your categories on the site first than start uploading them.
The site does not recognize all of the barcodes (I assume because no one has scanned that book in prior to me) so occasionally you will have to type in the title yourself.
After scanning all of my books in, I bought bins and started putting them in bins. Each bin was assigned a color and a identical colored dot was "stickered" on to the book.
The Best Part
Now all I have to do is log on to the site and my students checkout books by themselves and return them as well. Once checked in, studnets place it in the blue container. I have 1 librarian a week whose job is to place the books back in the appropriate containers. Since I color coded my books using garage sell stickers, my librarian has no problem putting books back where they belong. This ensures that my books are always in order by their category.
0 comments:
Post a Comment